 عرض على TensorFlow.org عرض على TensorFlow.org |  تشغيل في Google Colab تشغيل في Google Colab |  عرض المصدر على جيثب عرض المصدر على جيثب |  تحميل دفتر تحميل دفتر |
يحتوي هذا البرنامج التعليمي على حد أدنى من تنفيذ DeepDream ، كما هو موضح في منشور المدونة هذا بواسطة Alexander Mordvintsev.
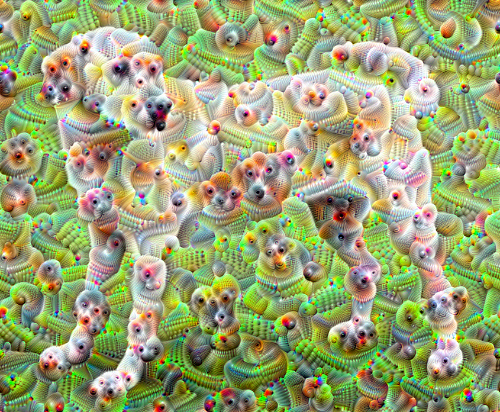
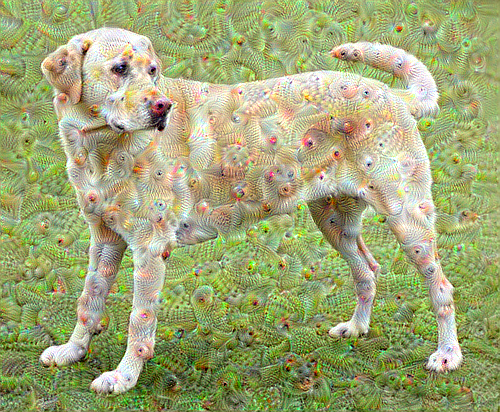
DeepDream هي تجربة تصور الأنماط التي تعلمتها الشبكة العصبية. على غرار ما يحدث عندما يشاهد الطفل السحب ويحاول تفسير الأشكال العشوائية ، فإن DeepDream يفسر ويعزز الأنماط التي يراها في الصورة.
يقوم بذلك عن طريق إعادة توجيه صورة عبر الشبكة ، ثم حساب تدرج الصورة فيما يتعلق بتنشيطات طبقة معينة. ثم يتم تعديل الصورة لزيادة هذه التنشيطات ، وتحسين الأنماط التي تراها الشبكة ، وينتج عن ذلك صورة تشبه الحلم. أُطلق على هذه العملية اسم "الاستهلال" (إشارة إلى InceptionNet ، والفيلم Inception).
دعنا نوضح كيف يمكنك جعل "حلم" الشبكة العصبية وتحسين الأنماط السريالية التي تراها في الصورة.
import tensorflow as tf
import numpy as np

import matplotlib as mpl

import IPython.display as display
import PIL.Image
اختر صورة لتحلم بها
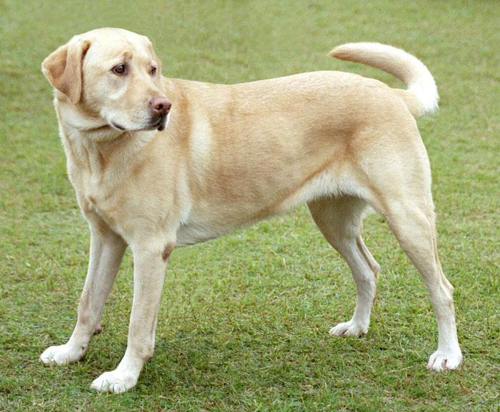
في هذا البرنامج التعليمي ، دعنا نستخدم صورة لابرادور .
url = 'https://storage.googleapis.com/download.tensorflow.org/example_images/YellowLabradorLooking_new.jpg'
# Download an image and read it into a NumPy array.
def download(url, max_dim=None):
  name = url.split('/')[-1]
  image_path = tf.keras.utils.get_file(name, origin=url)
  img = PIL.Image.open(image_path)
  if max_dim:
    img.thumbnail((max_dim, max_dim))
  return np.array(img)

# Normalize an image
def deprocess(img):
  img = 255*(img + 1.0)/2.0
  return tf.cast(img, tf.uint8)

# Display an image
def show(img):
  display.display(PIL.Image.fromarray(np.array(img)))


# Downsizing the image makes it easier to work with.
original_img = download(url, max_dim=500)
show(original_img)
display.display(display.HTML('Image cc-by: <a "href=https://commons.wikimedia.org/wiki/File:Felis_catus-cat_on_snow.jpg">Von.grzanka</a>'))
تحضير نموذج استخراج الميزة
قم بتنزيل وإعداد نموذج تصنيف للصور تم تدريبه مسبقًا. ستستخدم InceptionV3 المشابه للنموذج المستخدم أصلاً في DeepDream. لاحظ أن أي نموذج مدرب مسبقًا سيعمل ، على الرغم من أنه سيتعين عليك ضبط أسماء الطبقات أدناه إذا قمت بتغيير هذا.
base_model = tf.keras.applications.InceptionV3(include_top=False, weights='imagenet')
Downloading data from https://storage.googleapis.com/tensorflow/keras-applications/inception_v3/inception_v3_weights_tf_dim_ordering_tf_kernels_notop.h5
87916544/87910968 [==============================] - 0s 0us/step
87924736/87910968 [==============================] - 0s 0us/step
الفكرة في DeepDream هي اختيار طبقة (أو طبقات) وتعظيم "الخسارة" بطريقة تجعل الصورة "تثير" الطبقات بشكل متزايد. يعتمد تعقيد الميزات المدمجة على الطبقات التي اخترتها ، على سبيل المثال ، تنتج الطبقات السفلية حدودًا أو أنماطًا بسيطة ، بينما تعطي الطبقات الأعمق ميزات متطورة في الصور ، أو حتى كائنات كاملة.
بنية InceptionV3 كبيرة جدًا (للحصول على رسم بياني لهندسة النموذج ، راجع مستودع أبحاث TensorFlow). بالنسبة لـ DeepDream ، فإن طبقات الاهتمام هي تلك التي يتم فيها تسلسل التلافيف. هناك 11 من هذه الطبقات في InceptionV3 ، تسمى "مختلطة 0" على الرغم من "مختلطة 10". سيؤدي استخدام طبقات مختلفة إلى صور مختلفة تشبه الحلم. تستجيب الطبقات الأعمق لميزات المستوى الأعلى (مثل العيون والوجوه) ، بينما تستجيب الطبقات السابقة للمعالم الأبسط (مثل الحواف والأشكال والأنسجة). لا تتردد في تجربة الطبقات المحددة أدناه ، ولكن ضع في اعتبارك أن الطبقات الأعمق (تلك ذات الفهرس الأعلى) ستستغرق وقتًا أطول للتدريب عليها لأن حساب التدرج أعمق.
# Maximize the activations of these layers
names = ['mixed3', 'mixed5']
layers = [base_model.get_layer(name).output for name in names]

# Create the feature extraction model
dream_model = tf.keras.Model(inputs=base_model.input, outputs=layers)
احسب الخسارة
الخسارة هي مجموع عمليات التنشيط في الطبقات المختارة. يتم تسوية الخسارة في كل طبقة بحيث لا تفوق المساهمة من الطبقات الأكبر الطبقات الأصغر. عادة ، الخسارة هي الكمية التي ترغب في تقليلها عن طريق النسب المتدرج. في DeepDream ، ستزيد هذه الخسارة إلى أقصى حد عبر صعود التدرج.
def calc_loss(img, model):
  # Pass forward the image through the model to retrieve the activations.
  # Converts the image into a batch of size 1.
  img_batch = tf.expand_dims(img, axis=0)
  layer_activations = model(img_batch)
  if len(layer_activations) == 1:
    layer_activations = [layer_activations]

  losses = []
  for act in layer_activations:
    loss = tf.math.reduce_mean(act)
    losses.append(loss)

  return  tf.reduce_sum(losses)
صعود متدرج
بمجرد حساب الخسارة للطبقات المختارة ، كل ما تبقى هو حساب التدرجات فيما يتعلق بالصورة ، وإضافتها إلى الصورة الأصلية.
تؤدي إضافة التدرجات إلى الصورة إلى تحسين الأنماط التي تراها الشبكة. في كل خطوة ، ستكون قد أنشأت صورة تثير بشكل متزايد تنشيط طبقات معينة في الشبكة.
الطريقة التي تقوم بهذا ، أدناه ، ملفوفة في tf.function للأداء. يستخدم input_signature لضمان عدم إعادة تتبع الوظيفة لأحجام صور مختلفة أو قيم steps / step_size . راجع دليل وظائف الخرسانة للحصول على التفاصيل.
class DeepDream(tf.Module):
  def __init__(self, model):
    self.model = model

  @tf.function(
      input_signature=(
        tf.TensorSpec(shape=[None,None,3], dtype=tf.float32),
        tf.TensorSpec(shape=[], dtype=tf.int32),
        tf.TensorSpec(shape=[], dtype=tf.float32),)
  )
  def __call__(self, img, steps, step_size):
      print("Tracing")
      loss = tf.constant(0.0)
      for n in tf.range(steps):
        with tf.GradientTape() as tape:
          # This needs gradients relative to `img`
          # `GradientTape` only watches `tf.Variable`s by default
          tape.watch(img)
          loss = calc_loss(img, self.model)

        # Calculate the gradient of the loss with respect to the pixels of the input image.
        gradients = tape.gradient(loss, img)

        # Normalize the gradients.
        gradients /= tf.math.reduce_std(gradients) + 1e-8

        # In gradient ascent, the "loss" is maximized so that the input image increasingly "excites" the layers.
        # You can update the image by directly adding the gradients (because they're the same shape!)
        img = img + gradients*step_size
        img = tf.clip_by_value(img, -1, 1)

      return loss, img
deepdream = DeepDream(dream_model)
الحلقة الرئيسية
def run_deep_dream_simple(img, steps=100, step_size=0.01):
  # Convert from uint8 to the range expected by the model.
  img = tf.keras.applications.inception_v3.preprocess_input(img)
  img = tf.convert_to_tensor(img)
  step_size = tf.convert_to_tensor(step_size)
  steps_remaining = steps
  step = 0
  while steps_remaining:
    if steps_remaining>100:
      run_steps = tf.constant(100)
    else:
      run_steps = tf.constant(steps_remaining)
    steps_remaining -= run_steps
    step += run_steps

    loss, img = deepdream(img, run_steps, tf.constant(step_size))

    display.clear_output(wait=True)
    show(deprocess(img))
    print ("Step {}, loss {}".format(step, loss))


  result = deprocess(img)
  display.clear_output(wait=True)
  show(result)

  return result
dream_img = run_deep_dream_simple(img=original_img,
                                  steps=100, step_size=0.01)
تناوله بأعلى صوت
جيد جدًا ، ولكن هناك بعض المشكلات في هذه المحاولة الأولى:
- الإخراج صاخب (يمكن معالجة ذلك بخسارة
tf.image.total_variation). - الصورة هي دقة منخفضة.
- تظهر الأنماط وكأنها تحدث جميعها بنفس الدقة.
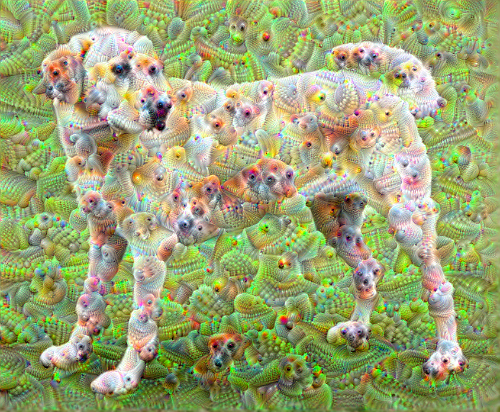
أحد الأساليب التي تعالج كل هذه المشاكل هو تطبيق صعود متدرج على مستويات مختلفة. سيسمح ذلك بدمج الأنماط التي تم إنشاؤها بمقاييس أصغر في أنماط بمقاييس أعلى وتعبئتها بتفاصيل إضافية.
للقيام بذلك ، يمكنك تنفيذ نهج صعود التدرج السابق ، ثم زيادة حجم الصورة (والتي يشار إليها باسم الأوكتاف) ، وتكرار هذه العملية لعدة أوكتافات.
import time
start = time.time()

OCTAVE_SCALE = 1.30

img = tf.constant(np.array(original_img))
base_shape = tf.shape(img)[:-1]
float_base_shape = tf.cast(base_shape, tf.float32)

for n in range(-2, 3):
  new_shape = tf.cast(float_base_shape*(OCTAVE_SCALE**n), tf.int32)

  img = tf.image.resize(img, new_shape).numpy()

  img = run_deep_dream_simple(img=img, steps=50, step_size=0.01)

display.clear_output(wait=True)
img = tf.image.resize(img, base_shape)
img = tf.image.convert_image_dtype(img/255.0, dtype=tf.uint8)
show(img)

end = time.time()
end-start
6.38355278968811
اختياري: توسيع النطاق باستخدام البلاط
شيء واحد يجب مراعاته هو أنه كلما زاد حجم الصورة ، سيزداد الوقت والذاكرة اللازمين لإجراء حساب التدرج. لن يعمل تطبيق الأوكتاف أعلاه على الصور الكبيرة جدًا أو العديد من الأوكتافات.
لتجنب هذه المشكلة ، يمكنك تقسيم الصورة إلى مربعات وحساب التدرج اللوني لكل بلاطة.
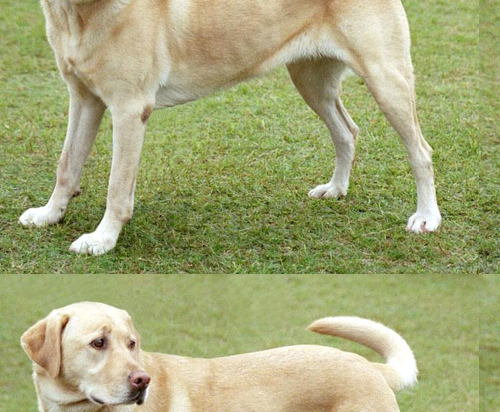
يؤدي تطبيق إزاحات عشوائية على الصورة قبل كل حساب مترابط إلى منع ظهور طبقات التجانب.
ابدأ بتنفيذ التحول العشوائي:
def random_roll(img, maxroll):
  # Randomly shift the image to avoid tiled boundaries.
  shift = tf.random.uniform(shape=[2], minval=-maxroll, maxval=maxroll, dtype=tf.int32)
  img_rolled = tf.roll(img, shift=shift, axis=[0,1])
  return shift, img_rolled
shift, img_rolled = random_roll(np.array(original_img), 512)
show(img_rolled)
في ما يلي مكافئ مترابط لوظيفة deepdream تحديدها مسبقًا:
class TiledGradients(tf.Module):
  def __init__(self, model):
    self.model = model

  @tf.function(
      input_signature=(
        tf.TensorSpec(shape=[None,None,3], dtype=tf.float32),
        tf.TensorSpec(shape=[2], dtype=tf.int32),
        tf.TensorSpec(shape=[], dtype=tf.int32),)
  )
  def __call__(self, img, img_size, tile_size=512):
    shift, img_rolled = random_roll(img, tile_size)

    # Initialize the image gradients to zero.
    gradients = tf.zeros_like(img_rolled)

    # Skip the last tile, unless there's only one tile.
    xs = tf.range(0, img_size[1], tile_size)[:-1]
    if not tf.cast(len(xs), bool):
      xs = tf.constant([0])
    ys = tf.range(0, img_size[0], tile_size)[:-1]
    if not tf.cast(len(ys), bool):
      ys = tf.constant([0])

    for x in xs:
      for y in ys:
        # Calculate the gradients for this tile.
        with tf.GradientTape() as tape:
          # This needs gradients relative to `img_rolled`.
          # `GradientTape` only watches `tf.Variable`s by default.
          tape.watch(img_rolled)

          # Extract a tile out of the image.
          img_tile = img_rolled[y:y+tile_size, x:x+tile_size]
          loss = calc_loss(img_tile, self.model)

        # Update the image gradients for this tile.
        gradients = gradients + tape.gradient(loss, img_rolled)

    # Undo the random shift applied to the image and its gradients.
    gradients = tf.roll(gradients, shift=-shift, axis=[0,1])

    # Normalize the gradients.
    gradients /= tf.math.reduce_std(gradients) + 1e-8

    return gradients
get_tiled_gradients = TiledGradients(dream_model)
يؤدي وضع هذا معًا إلى توفير تنفيذ أحلام عميق قابل للتطوير ومراعي الأوكتاف:
def run_deep_dream_with_octaves(img, steps_per_octave=100, step_size=0.01,
                                octaves=range(-2,3), octave_scale=1.3):
  base_shape = tf.shape(img)
  img = tf.keras.utils.img_to_array(img)
  img = tf.keras.applications.inception_v3.preprocess_input(img)

  initial_shape = img.shape[:-1]
  img = tf.image.resize(img, initial_shape)
  for octave in octaves:
    # Scale the image based on the octave
    new_size = tf.cast(tf.convert_to_tensor(base_shape[:-1]), tf.float32)*(octave_scale**octave)
    new_size = tf.cast(new_size, tf.int32)
    img = tf.image.resize(img, new_size)

    for step in range(steps_per_octave):
      gradients = get_tiled_gradients(img, new_size)
      img = img + gradients*step_size
      img = tf.clip_by_value(img, -1, 1)

      if step % 10 == 0:
        display.clear_output(wait=True)
        show(deprocess(img))
        print ("Octave {}, Step {}".format(octave, step))

  result = deprocess(img)
  return result
img = run_deep_dream_with_octaves(img=original_img, step_size=0.01)

display.clear_output(wait=True)
img = tf.image.resize(img, base_shape)
img = tf.image.convert_image_dtype(img/255.0, dtype=tf.uint8)
show(img)
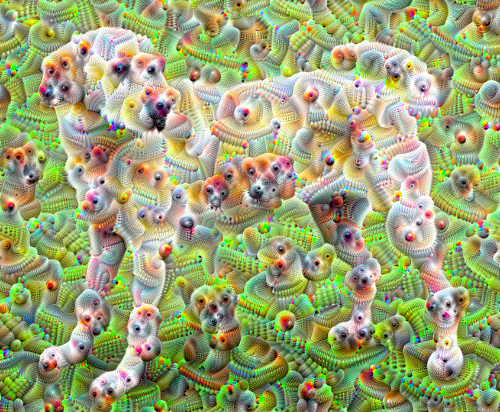
أفضل بكثير! العب مع عدد الأوكتافات ، ومقياس الأوكتاف ، والطبقات النشطة لتغيير شكل صورة DeepDream-ed.
قد يهتم القراء أيضًا بـ TensorFlow Lucid الذي يتوسع في الأفكار المقدمة في هذا البرنامج التعليمي لتصور الشبكات العصبية وتفسيرها.
