 הצג באתר TensorFlow.org הצג באתר TensorFlow.org |  הפעל בגוגל קולאב הפעל בגוגל קולאב |  צפה במקור ב-GitHub צפה במקור ב-GitHub |  הורד מחברת הורד מחברת |
TensorBoard ניתן להשתמש ישירות בתוך חוויות מחברת כגון Colab ו Jupyter . זה יכול להיות מועיל לשיתוף תוצאות, שילוב TensorBoard בזרימות עבודה קיימות ושימוש ב- TensorBoard מבלי להתקין שום דבר באופן מקומי.
להכין
התחל בהתקנת TF 2.0 וטעינת תוסף המחברת TensorBoard:
עבור משתמשי Jupyter: אם התקנת Jupyter ו TensorBoard לאותו virtualenv, אז אתה צריך להיות טוב ללכת. אם אתה משתמש התקנה מסובכת יותר, כמו התקנת Jupyter עולמית גרעינים עבור סביבות שונות CONDA / virtualenv, אז אתה חייב להבטיח כי tensorboard בינארי הוא על שלך PATH בתוך ההקשר מחברת Jupyter. אחת הדרכים לעשות זאת היא לשנות את kernel_spec שתתווסף של סביבת bin ספרייה PATH , כפי שמתואר כאן .
עבור משתמשים דוקרים: במקרה אתה מפעיל דוקר תמונה של שרת מחברת Jupyter באמצעות TensorFlow של לילי , יש צורך לחשוף לא רק את יציאת המחברת, אבל הנמל של TensorBoard. לפיכך, הפעל את המיכל עם הפקודה הבאה:
docker run -it -p 8888:8888 -p 6006:6006 \
tensorflow/tensorflow:nightly-py3-jupyter
היכן -p 6006 הוא יציאת ברירת המחדל של TensorBoard. זה יקצה לך יציאה להפעלת מופע אחד של TensorBoard. כדי לקבל מופעים במקביל, יש צורך להקצות יותר יציאות. כמו כן, להעביר --bind_all כדי %tensorboard לחשוף את היציאה מחוץ מיכל.
# Load the TensorBoard notebook extension
%load_ext tensorboard
ייבוא TensorFlow, תאריך ושעה ומערכת הפעלה:
import tensorflow as tf
import datetime, os
TensorBoard במחברות
הורד את FashionMNIST במערך ולהרחיב אותו:
fashion_mnist = tf.keras.datasets.fashion_mnist

(x_train, y_train),(x_test, y_test) = fashion_mnist.load_data()
x_train, x_test = x_train / 255.0, x_test / 255.0
Downloading data from https://storage.googleapis.com/tensorflow/tf-keras-datasets/train-labels-idx1-ubyte.gz
32768/29515 [=================================] - 0s 0us/step
Downloading data from https://storage.googleapis.com/tensorflow/tf-keras-datasets/train-images-idx3-ubyte.gz
26427392/26421880 [==============================] - 0s 0us/step
Downloading data from https://storage.googleapis.com/tensorflow/tf-keras-datasets/t10k-labels-idx1-ubyte.gz
8192/5148 [===============================================] - 0s 0us/step
Downloading data from https://storage.googleapis.com/tensorflow/tf-keras-datasets/t10k-images-idx3-ubyte.gz
4423680/4422102 [==============================] - 0s 0us/step
צור מודל פשוט מאוד:
def create_model():
  return tf.keras.models.Sequential([
    tf.keras.layers.Flatten(input_shape=(28, 28)),
    tf.keras.layers.Dense(512, activation='relu'),
    tf.keras.layers.Dropout(0.2),
    tf.keras.layers.Dense(10, activation='softmax')
  ])
אמן את המודל באמצעות Keras ו-TensorBoard callback:
def train_model():

  model = create_model()
  model.compile(optimizer='adam',
                loss='sparse_categorical_crossentropy',
                metrics=['accuracy'])

  logdir = os.path.join("logs", datetime.datetime.now().strftime("%Y%m%d-%H%M%S"))
  tensorboard_callback = tf.keras.callbacks.TensorBoard(logdir, histogram_freq=1)

  model.fit(x=x_train,
            y=y_train,
            epochs=5,
            validation_data=(x_test, y_test),
            callbacks=[tensorboard_callback])

train_model()
Train on 60000 samples, validate on 10000 samples
Epoch 1/5
60000/60000 [==============================] - 11s 182us/sample - loss: 0.4976 - accuracy: 0.8204 - val_loss: 0.4143 - val_accuracy: 0.8538
Epoch 2/5
60000/60000 [==============================] - 10s 174us/sample - loss: 0.3845 - accuracy: 0.8588 - val_loss: 0.3855 - val_accuracy: 0.8626
Epoch 3/5
60000/60000 [==============================] - 10s 175us/sample - loss: 0.3513 - accuracy: 0.8705 - val_loss: 0.3740 - val_accuracy: 0.8607
Epoch 4/5
60000/60000 [==============================] - 11s 177us/sample - loss: 0.3287 - accuracy: 0.8793 - val_loss: 0.3596 - val_accuracy: 0.8719
Epoch 5/5
60000/60000 [==============================] - 11s 178us/sample - loss: 0.3153 - accuracy: 0.8825 - val_loss: 0.3360 - val_accuracy: 0.8782
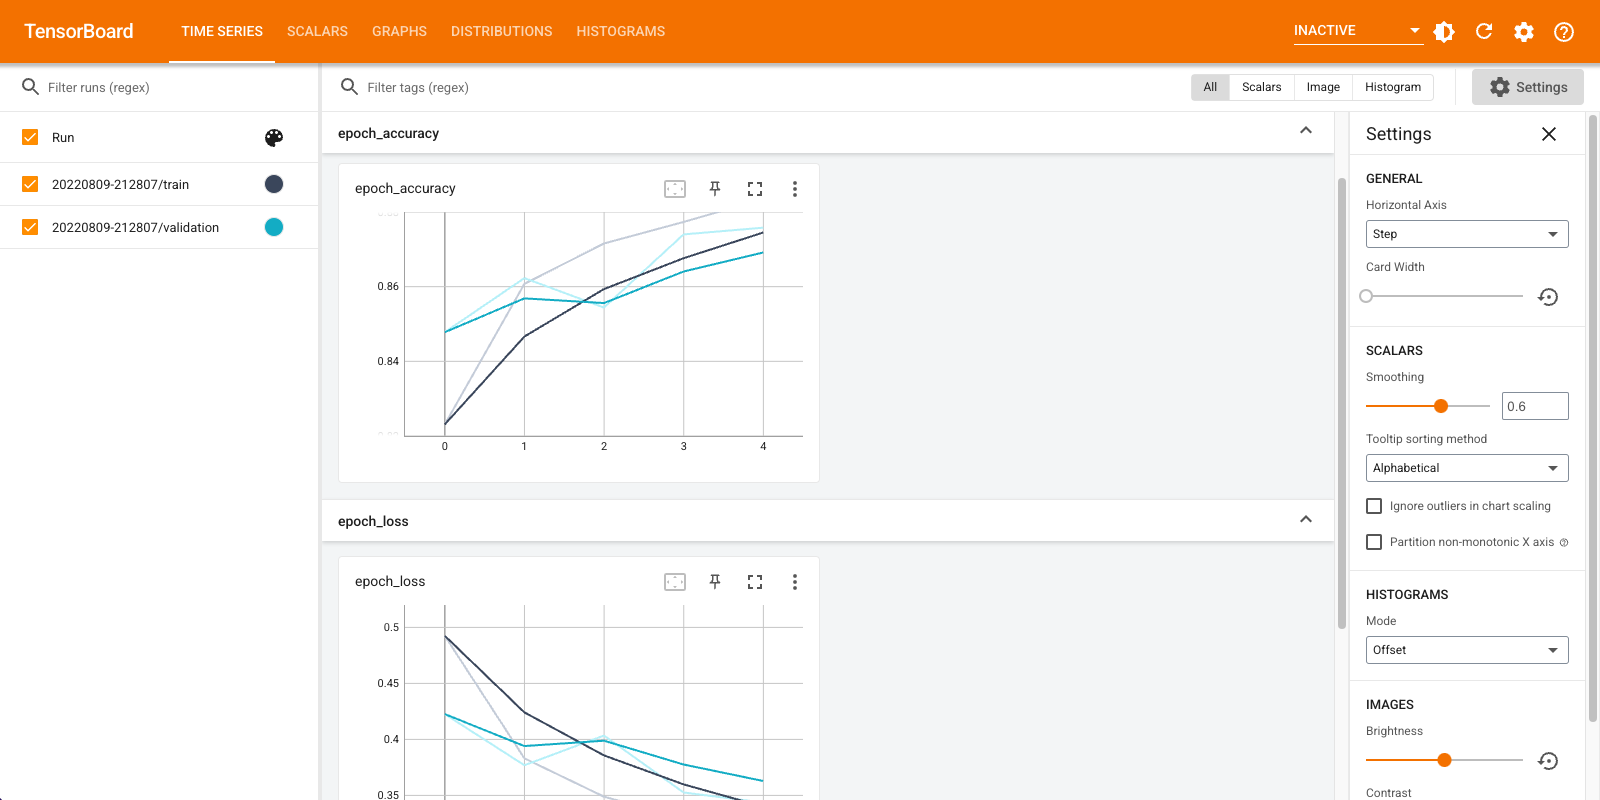
התחל TensorBoard בתוך המחברת באמצעות קסמים :
%tensorboard --logdir logs

כעת תוכל להציג לוחות מחוונים כגון סקלרים, גרפים, היסטוגרמות ואחרים. לוחות מחוונים מסוימים אינם זמינים עדיין ב-Colab (כגון תוסף הפרופיל).
%tensorboard קסם יש בדיוק באותה מתכונת השבעה שורת הפקודה TensorBoard, אבל עם % -sign מול זה.
אתה יכול גם להפעיל את TensorBoard לפני האימון כדי לעקוב אחריו בתהליך:
%tensorboard --logdir logs

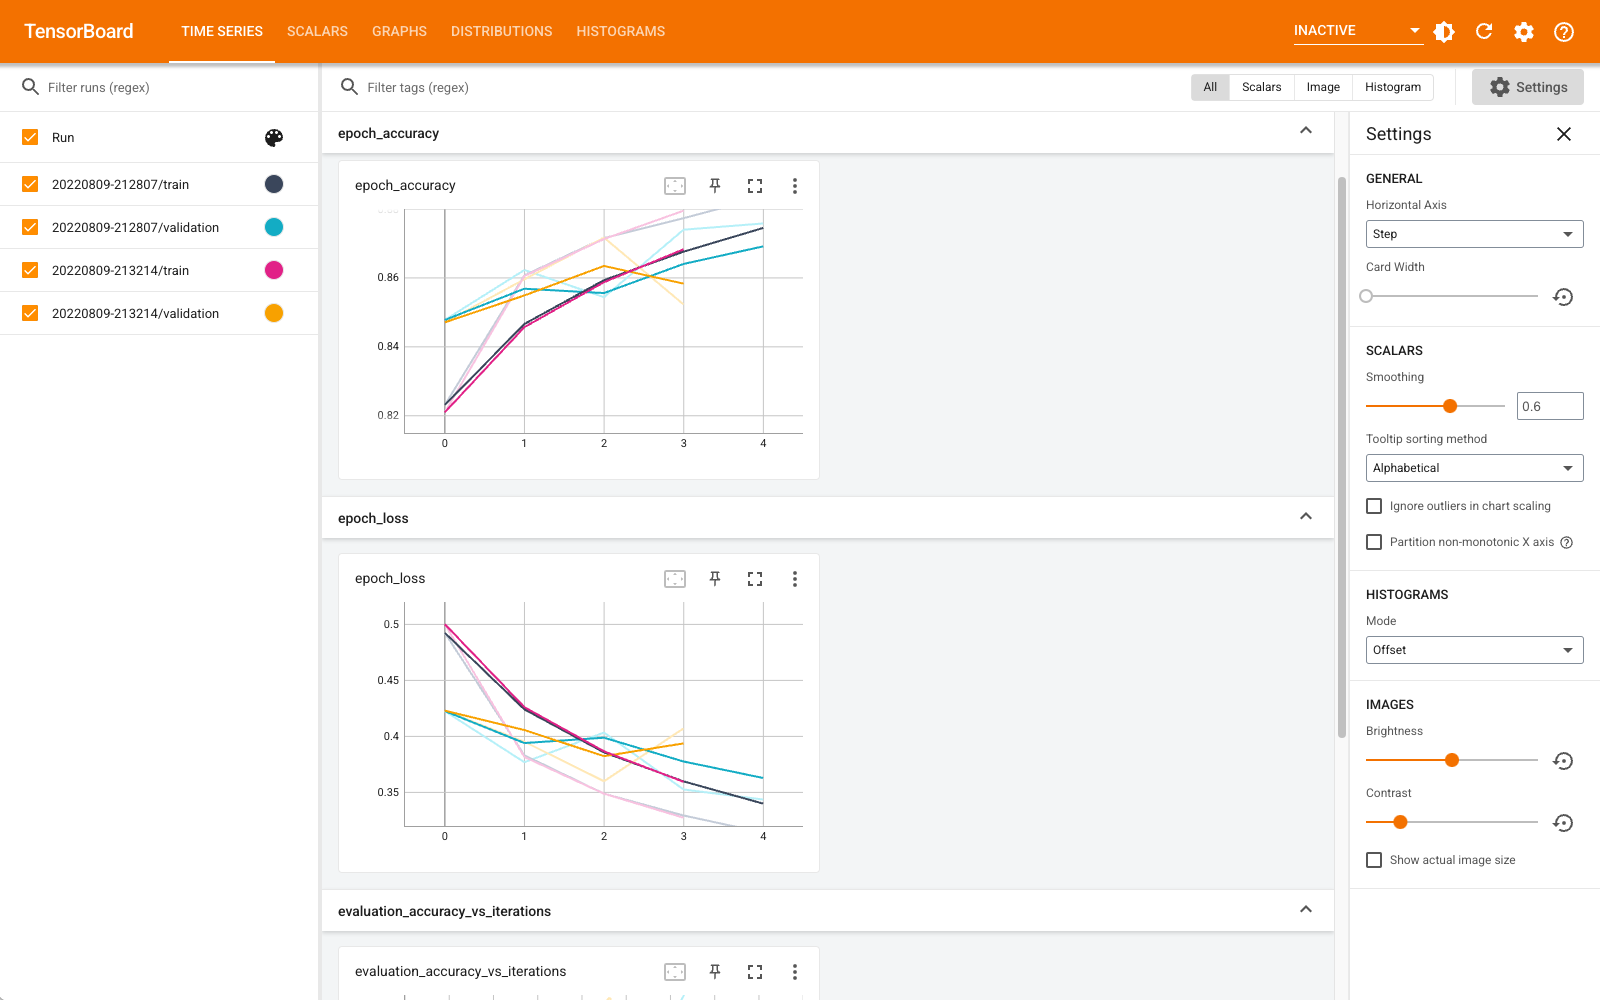
נעשה שימוש חוזר באותו TensorBoard על ידי הוצאת אותה פקודה. אם תיבחר ספריית יומנים אחרת, ייפתח מופע חדש של TensorBoard. יציאות מנוהלות באופן אוטומטי.
התחל לאמן דגם חדש וצפה ב-TensorBoard מתעדכן אוטומטית כל 30 שניות או רענן אותו באמצעות הכפתור בצד ימין למעלה:
train_model()
Train on 60000 samples, validate on 10000 samples
Epoch 1/5
60000/60000 [==============================] - 11s 184us/sample - loss: 0.4968 - accuracy: 0.8223 - val_loss: 0.4216 - val_accuracy: 0.8481
Epoch 2/5
60000/60000 [==============================] - 11s 176us/sample - loss: 0.3847 - accuracy: 0.8587 - val_loss: 0.4056 - val_accuracy: 0.8545
Epoch 3/5
60000/60000 [==============================] - 11s 176us/sample - loss: 0.3495 - accuracy: 0.8727 - val_loss: 0.3600 - val_accuracy: 0.8700
Epoch 4/5
60000/60000 [==============================] - 11s 179us/sample - loss: 0.3282 - accuracy: 0.8795 - val_loss: 0.3636 - val_accuracy: 0.8694
Epoch 5/5
60000/60000 [==============================] - 11s 176us/sample - loss: 0.3115 - accuracy: 0.8839 - val_loss: 0.3438 - val_accuracy: 0.8764
אתה יכול להשתמש tensorboard.notebook API לשימוש מלא קצת יותר:
from tensorboard import notebook
notebook.list() # View open TensorBoard instances
Known TensorBoard instances:

  - port 6006: logdir logs (started 0:00:54 ago; pid 265)
# Control TensorBoard display. If no port is provided,
# the most recently launched TensorBoard is used
notebook.display(port=6006, height=1000)

