
|
|
|
 View source on GitHub View source on GitHub
|
|
|
The TensorFlow Lite Model Maker library simplifies the process of adapting and converting a TensorFlow neural-network model to particular input data when deploying this model for on-device ML applications.
This notebook shows an end-to-end example that utilizes this Model Maker library to illustrate the adaption and conversion of a commonly-used image classification model to classify flowers on a mobile device.
Prerequisites
To run this example, we first need to install several required packages, including Model Maker package that in GitHub repo.
sudo apt -y install libportaudio2pip install -q tflite-model-maker
Import the required packages.
import os

import numpy as np

import tensorflow as tf
assert tf.__version__.startswith('2')

from tflite_model_maker import model_spec
from tflite_model_maker import image_classifier
from tflite_model_maker.config import ExportFormat
from tflite_model_maker.config import QuantizationConfig
from tflite_model_maker.image_classifier import DataLoader

import matplotlib.pyplot as plt
2024-07-19 12:35:37.780503: W tensorflow/stream_executor/platform/default/dso_loader.cc:64] Could not load dynamic library 'libcudart.so.11.0'; dlerror: libcudart.so.11.0: cannot open shared object file: No such file or directory
/tmpfs/src/tf_docs_env/lib/python3.9/site-packages/tensorflow_addons/utils/tfa_eol_msg.py:23: UserWarning:

TensorFlow Addons (TFA) has ended development and introduction of new features.
TFA has entered a minimal maintenance and release mode until a planned end of life in May 2024.
Please modify downstream libraries to take dependencies from other repositories in our TensorFlow community (e.g. Keras, Keras-CV, and Keras-NLP).

For more information see: https://github.com/tensorflow/addons/issues/2807

  warnings.warn(
/tmpfs/src/tf_docs_env/lib/python3.9/site-packages/tensorflow_addons/utils/ensure_tf_install.py:53: UserWarning: Tensorflow Addons supports using Python ops for all Tensorflow versions above or equal to 2.13.0 and strictly below 2.16.0 (nightly versions are not supported).
 The versions of TensorFlow you are currently using is 2.8.4 and is not supported.
Some things might work, some things might not.
If you were to encounter a bug, do not file an issue.
If you want to make sure you're using a tested and supported configuration, either change the TensorFlow version or the TensorFlow Addons's version.
You can find the compatibility matrix in TensorFlow Addon's readme:
https://github.com/tensorflow/addons
  warnings.warn(
Simple End-to-End Example
Get the data path
Let's get some images to play with this simple end-to-end example. Hundreds of images is a good start for Model Maker while more data could achieve better accuracy.
image_path = tf.keras.utils.get_file(
      'flower_photos.tgz',
      'https://storage.googleapis.com/download.tensorflow.org/example_images/flower_photos.tgz',
      extract=True)
image_path = os.path.join(os.path.dirname(image_path), 'flower_photos')
Downloading data from https://storage.googleapis.com/download.tensorflow.org/example_images/flower_photos.tgz
228818944/228813984 [==============================] - 1s 0us/step
228827136/228813984 [==============================] - 1s 0us/step
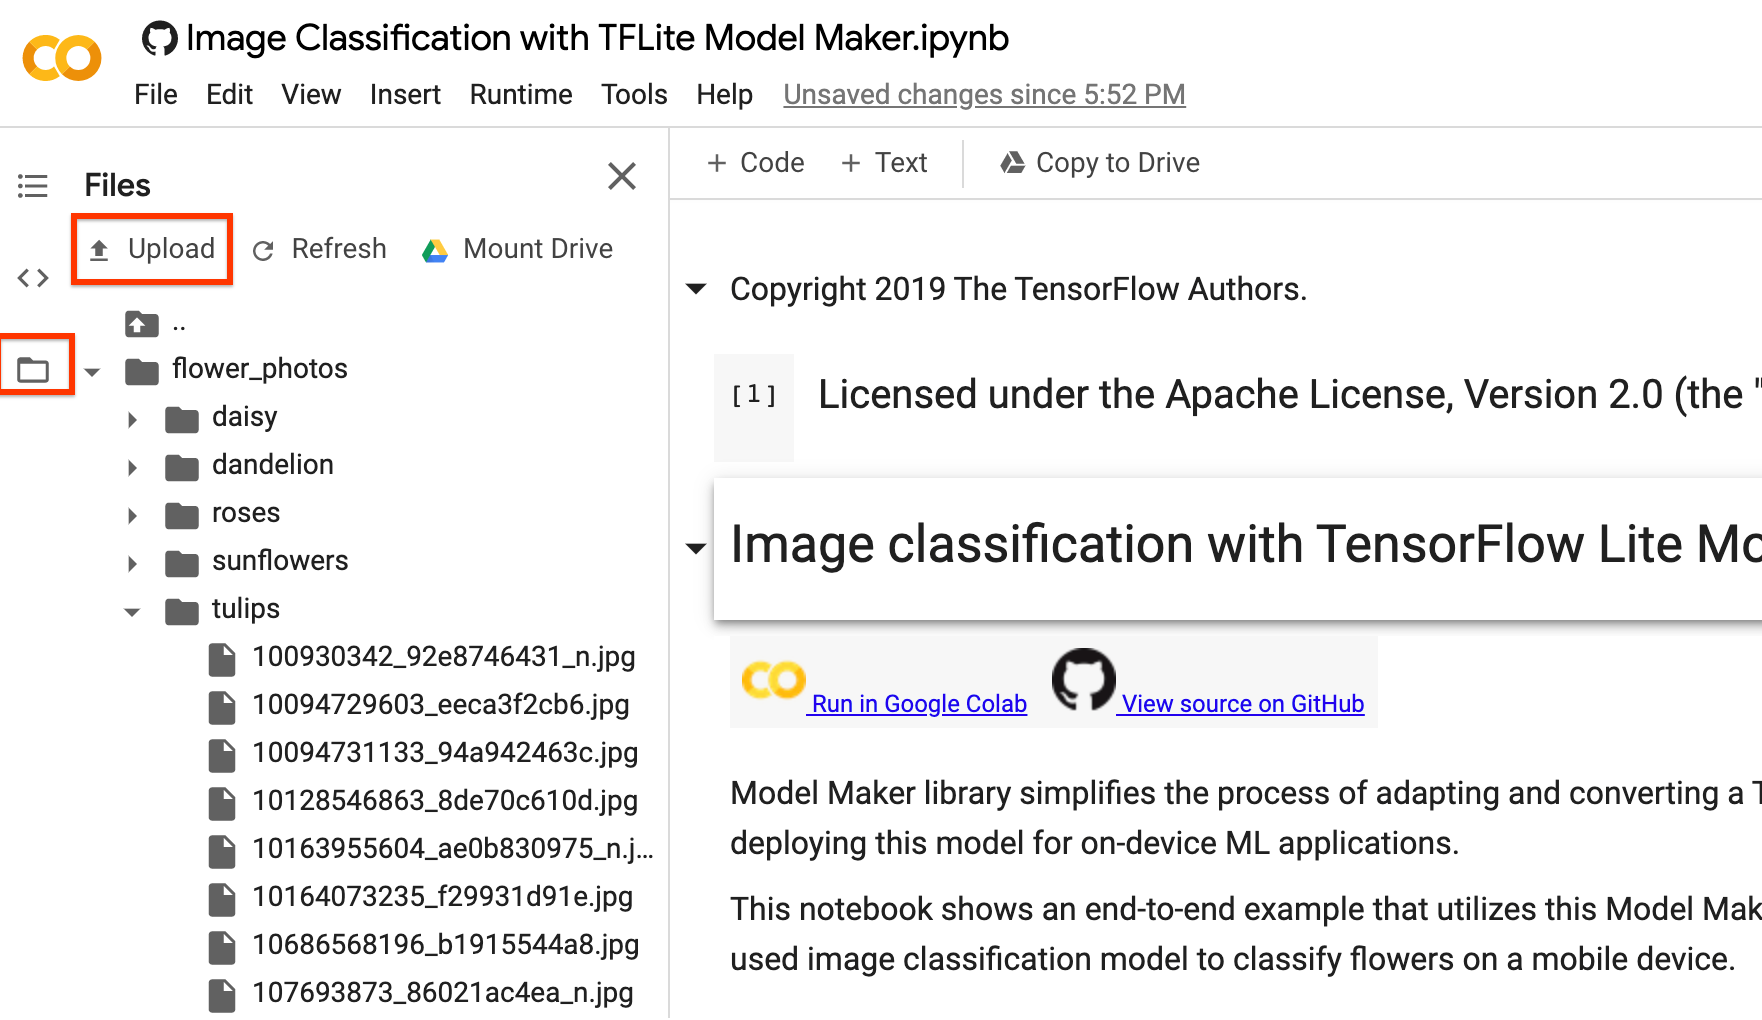
You could replace image_path with your own image folders. As for uploading data to colab, you could find the upload button in the left sidebar shown in the image below with the red rectangle. Just have a try to upload a zip file and unzip it. The root file path is the current path.
If you prefer not to upload your images to the cloud, you could try to run the library locally following the guide in GitHub.
Run the example
The example just consists of 4 lines of code as shown below, each of which representing one step of the overall process.
Step 1. Load input data specific to an on-device ML app. Split it into training data and testing data.
data = DataLoader.from_folder(image_path)
train_data, test_data = data.split(0.9)
INFO:tensorflow:Load image with size: 3670, num_label: 5, labels: daisy, dandelion, roses, sunflowers, tulips.
2024-07-19 12:35:44.285069: W tensorflow/stream_executor/platform/default/dso_loader.cc:64] Could not load dynamic library 'libcudart.so.11.0'; dlerror: libcudart.so.11.0: cannot open shared object file: No such file or directory; LD_LIBRARY_PATH: /tmpfs/src/tf_docs_env/lib/python3.9/site-packages/cv2/../../lib64:
2024-07-19 12:35:44.285187: W tensorflow/stream_executor/platform/default/dso_loader.cc:64] Could not load dynamic library 'libcublas.so.11'; dlerror: libcublas.so.11: cannot open shared object file: No such file or directory; LD_LIBRARY_PATH: /tmpfs/src/tf_docs_env/lib/python3.9/site-packages/cv2/../../lib64:
2024-07-19 12:35:44.285262: W tensorflow/stream_executor/platform/default/dso_loader.cc:64] Could not load dynamic library 'libcublasLt.so.11'; dlerror: libcublasLt.so.11: cannot open shared object file: No such file or directory; LD_LIBRARY_PATH: /tmpfs/src/tf_docs_env/lib/python3.9/site-packages/cv2/../../lib64:
2024-07-19 12:35:44.285333: W tensorflow/stream_executor/platform/default/dso_loader.cc:64] Could not load dynamic library 'libcufft.so.10'; dlerror: libcufft.so.10: cannot open shared object file: No such file or directory; LD_LIBRARY_PATH: /tmpfs/src/tf_docs_env/lib/python3.9/site-packages/cv2/../../lib64:
2024-07-19 12:35:44.344561: W tensorflow/stream_executor/platform/default/dso_loader.cc:64] Could not load dynamic library 'libcusparse.so.11'; dlerror: libcusparse.so.11: cannot open shared object file: No such file or directory; LD_LIBRARY_PATH: /tmpfs/src/tf_docs_env/lib/python3.9/site-packages/cv2/../../lib64:
2024-07-19 12:35:44.344787: W tensorflow/core/common_runtime/gpu/gpu_device.cc:1850] Cannot dlopen some GPU libraries. Please make sure the missing libraries mentioned above are installed properly if you would like to use GPU. Follow the guide at https://www.tensorflow.org/install/gpu for how to download and setup the required libraries for your platform.
Skipping registering GPU devices...
Step 2. Customize the TensorFlow model.
model = image_classifier.create(train_data)
INFO:tensorflow:Retraining the models...
Model: "sequential"
_________________________________________________________________
 Layer (type)                Output Shape              Param #
=================================================================
 hub_keras_layer_v1v2 (HubKe  (None, 1280)             3413024
 rasLayerV1V2)

 dropout (Dropout)           (None, 1280)              0

 dense (Dense)               (None, 5)                 6405

=================================================================
Total params: 3,419,429
Trainable params: 6,405
Non-trainable params: 3,413,024
_________________________________________________________________
None
Epoch 1/5
103/103 [==============================] - 21s 190ms/step - loss: 0.8767 - accuracy: 0.7621
Epoch 2/5
103/103 [==============================] - 19s 181ms/step - loss: 0.6579 - accuracy: 0.8962
Epoch 3/5
103/103 [==============================] - 18s 177ms/step - loss: 0.6233 - accuracy: 0.9150
Epoch 4/5
103/103 [==============================] - 19s 182ms/step - loss: 0.6040 - accuracy: 0.9245
Epoch 5/5
103/103 [==============================] - 18s 178ms/step - loss: 0.5901 - accuracy: 0.9333
Step 3. Evaluate the model.
loss, accuracy = model.evaluate(test_data)
12/12 [==============================] - 3s 178ms/step - loss: 0.5881 - accuracy: 0.9292
Step 4. Export to TensorFlow Lite model.
Here, we export TensorFlow Lite model with metadata which provides a standard for model descriptions. The label file is embedded in metadata. The default post-training quantization technique is full integer quantization for the image classification task.
You could download it in the left sidebar same as the uploading part for your own use.
model.export(export_dir='.')
2024-07-19 12:37:27.493941: W tensorflow/python/util/util.cc:368] Sets are not currently considered sequences, but this may change in the future, so consider avoiding using them.
INFO:tensorflow:Assets written to: /tmpfs/tmp/tmpd1bsdt9a/assets
INFO:tensorflow:Assets written to: /tmpfs/tmp/tmpd1bsdt9a/assets
2024-07-19 12:37:33.479905: W tensorflow/core/common_runtime/gpu/gpu_device.cc:1850] Cannot dlopen some GPU libraries. Please make sure the missing libraries mentioned above are installed properly if you would like to use GPU. Follow the guide at https://www.tensorflow.org/install/gpu for how to download and setup the required libraries for your platform.
Skipping registering GPU devices...
/tmpfs/src/tf_docs_env/lib/python3.9/site-packages/tensorflow/lite/python/convert.py:746: UserWarning: Statistics for quantized inputs were expected, but not specified; continuing anyway.
  warnings.warn("Statistics for quantized inputs were expected, but not "
2024-07-19 12:37:34.403650: W tensorflow/compiler/mlir/lite/python/tf_tfl_flatbuffer_helpers.cc:357] Ignored output_format.
2024-07-19 12:37:34.403692: W tensorflow/compiler/mlir/lite/python/tf_tfl_flatbuffer_helpers.cc:360] Ignored drop_control_dependency.
INFO:tensorflow:Label file is inside the TFLite model with metadata.
fully_quantize: 0, inference_type: 6, input_inference_type: 3, output_inference_type: 3
INFO:tensorflow:Label file is inside the TFLite model with metadata.
INFO:tensorflow:Saving labels in /tmpfs/tmp/tmpwzdivu4j/labels.txt
INFO:tensorflow:Saving labels in /tmpfs/tmp/tmpwzdivu4j/labels.txt
INFO:tensorflow:TensorFlow Lite model exported successfully: ./model.tflite
INFO:tensorflow:TensorFlow Lite model exported successfully: ./model.tflite
After these simple 4 steps, we could further use TensorFlow Lite model file in on-device applications like in image classification reference app.
Detailed Process
Currently, we support several models such as EfficientNet-Lite* models, MobileNetV2, ResNet50 as pre-trained models for image classification. But it is very flexible to add new pre-trained models to this library with just a few lines of code.
The following walks through this end-to-end example step by step to show more detail.
Step 1: Load Input Data Specific to an On-device ML App
The flower dataset contains 3670 images belonging to 5 classes. Download the archive version of the dataset and untar it.
The dataset has the following directory structure:
flower_photos
|__ daisy
    |______ 100080576_f52e8ee070_n.jpg
    |______ 14167534527_781ceb1b7a_n.jpg
    |______ ...
|__ dandelion
    |______ 10043234166_e6dd915111_n.jpg
    |______ 1426682852_e62169221f_m.jpg
    |______ ...
|__ roses
    |______ 102501987_3cdb8e5394_n.jpg
    |______ 14982802401_a3dfb22afb.jpg
    |______ ...
|__ sunflowers
    |______ 12471791574_bb1be83df4.jpg
    |______ 15122112402_cafa41934f.jpg
    |______ ...
|__ tulips
    |______ 13976522214_ccec508fe7.jpg
    |______ 14487943607_651e8062a1_m.jpg
    |______ ...
image_path = tf.keras.utils.get_file(
      'flower_photos.tgz',
      'https://storage.googleapis.com/download.tensorflow.org/example_images/flower_photos.tgz',
      extract=True)
image_path = os.path.join(os.path.dirname(image_path), 'flower_photos')
Use DataLoader class to load data.
As for from_folder() method, it could load data from the folder. It assumes that the image data of the same class are in the same subdirectory and the subfolder name is the class name. Currently, JPEG-encoded images and PNG-encoded images are supported.
data = DataLoader.from_folder(image_path)
INFO:tensorflow:Load image with size: 3670, num_label: 5, labels: daisy, dandelion, roses, sunflowers, tulips.
INFO:tensorflow:Load image with size: 3670, num_label: 5, labels: daisy, dandelion, roses, sunflowers, tulips.
Split it to training data (80%), validation data (10%, optional) and testing data (10%).
train_data, rest_data = data.split(0.8)
validation_data, test_data = rest_data.split(0.5)
Show 25 image examples with labels.
plt.figure(figsize=(10,10))
for i, (image, label) in enumerate(data.gen_dataset().unbatch().take(25)):
  plt.subplot(5,5,i+1)
  plt.xticks([])
  plt.yticks([])
  plt.grid(False)
  plt.imshow(image.numpy(), cmap=plt.cm.gray)
  plt.xlabel(data.index_to_label[label.numpy()])
plt.show()

Step 2: Customize the TensorFlow Model
Create a custom image classifier model based on the loaded data. The default model is EfficientNet-Lite0.
model = image_classifier.create(train_data, validation_data=validation_data)
INFO:tensorflow:Retraining the models...
INFO:tensorflow:Retraining the models...
Model: "sequential_1"
_________________________________________________________________
 Layer (type)                Output Shape              Param #
=================================================================
 hub_keras_layer_v1v2_1 (Hub  (None, 1280)             3413024
 KerasLayerV1V2)

 dropout_1 (Dropout)         (None, 1280)              0

 dense_1 (Dense)             (None, 5)                 6405

=================================================================
Total params: 3,419,429
Trainable params: 6,405
Non-trainable params: 3,413,024
_________________________________________________________________
None
Epoch 1/5
91/91 [==============================] - 21s 212ms/step - loss: 0.8667 - accuracy: 0.7658 - val_loss: 0.6696 - val_accuracy: 0.8883
Epoch 2/5
91/91 [==============================] - 19s 204ms/step - loss: 0.6557 - accuracy: 0.8987 - val_loss: 0.6400 - val_accuracy: 0.9019
Epoch 3/5
91/91 [==============================] - 19s 206ms/step - loss: 0.6261 - accuracy: 0.9169 - val_loss: 0.6257 - val_accuracy: 0.9019
Epoch 4/5
91/91 [==============================] - 18s 200ms/step - loss: 0.5985 - accuracy: 0.9327 - val_loss: 0.6170 - val_accuracy: 0.9101
Epoch 5/5
91/91 [==============================] - 18s 202ms/step - loss: 0.5905 - accuracy: 0.9337 - val_loss: 0.6125 - val_accuracy: 0.9128
Have a look at the detailed model structure.
model.summary()
Model: "sequential_1"
_________________________________________________________________
 Layer (type)                Output Shape              Param #
=================================================================
 hub_keras_layer_v1v2_1 (Hub  (None, 1280)             3413024
 KerasLayerV1V2)

 dropout_1 (Dropout)         (None, 1280)              0

 dense_1 (Dense)             (None, 5)                 6405

=================================================================
Total params: 3,419,429
Trainable params: 6,405
Non-trainable params: 3,413,024
_________________________________________________________________
Step 3: Evaluate the Customized Model
Evaluate the result of the model, get the loss and accuracy of the model.
loss, accuracy = model.evaluate(test_data)
12/12 [==============================] - 2s 163ms/step - loss: 0.6336 - accuracy: 0.9046
We could plot the predicted results in 100 test images. Predicted labels with red color are the wrong predicted results while others are correct.
# A helper function that returns 'red'/'black' depending on if its two input
# parameter matches or not.
def get_label_color(val1, val2):
  if val1 == val2:
    return 'black'
  else:
    return 'red'

# Then plot 100 test images and their predicted labels.
# If a prediction result is different from the label provided label in "test"
# dataset, we will highlight it in red color.
plt.figure(figsize=(20, 20))
predicts = model.predict_top_k(test_data)
for i, (image, label) in enumerate(test_data.gen_dataset().unbatch().take(100)):
  ax = plt.subplot(10, 10, i+1)
  plt.xticks([])
  plt.yticks([])
  plt.grid(False)
  plt.imshow(image.numpy(), cmap=plt.cm.gray)

  predict_label = predicts[i][0][0]
  color = get_label_color(predict_label,
                          test_data.index_to_label[label.numpy()])
  ax.xaxis.label.set_color(color)
  plt.xlabel('Predicted: %s' % predict_label)
plt.show()

If the accuracy doesn't meet the app requirement, one could refer to Advanced Usage to explore alternatives such as changing to a larger model, adjusting re-training parameters etc.
Step 4: Export to TensorFlow Lite Model
Convert the trained model to TensorFlow Lite model format with metadata so that you can later use in an on-device ML application. The label file and the vocab file are embedded in metadata. The default TFLite filename is model.tflite.
In many on-device ML application, the model size is an important factor. Therefore, it is recommended that you apply quantize the model to make it smaller and potentially run faster. The default post-training quantization technique is full integer quantization for the image classification task.
model.export(export_dir='.')
INFO:tensorflow:Assets written to: /tmpfs/tmp/tmp98j40l2h/assets
INFO:tensorflow:Assets written to: /tmpfs/tmp/tmp98j40l2h/assets
2024-07-19 12:40:15.003017: W tensorflow/core/common_runtime/gpu/gpu_device.cc:1850] Cannot dlopen some GPU libraries. Please make sure the missing libraries mentioned above are installed properly if you would like to use GPU. Follow the guide at https://www.tensorflow.org/install/gpu for how to download and setup the required libraries for your platform.
Skipping registering GPU devices...
/tmpfs/src/tf_docs_env/lib/python3.9/site-packages/tensorflow/lite/python/convert.py:746: UserWarning: Statistics for quantized inputs were expected, but not specified; continuing anyway.
  warnings.warn("Statistics for quantized inputs were expected, but not "
2024-07-19 12:40:15.857528: W tensorflow/compiler/mlir/lite/python/tf_tfl_flatbuffer_helpers.cc:357] Ignored output_format.
2024-07-19 12:40:15.857578: W tensorflow/compiler/mlir/lite/python/tf_tfl_flatbuffer_helpers.cc:360] Ignored drop_control_dependency.
INFO:tensorflow:Label file is inside the TFLite model with metadata.
fully_quantize: 0, inference_type: 6, input_inference_type: 3, output_inference_type: 3
INFO:tensorflow:Label file is inside the TFLite model with metadata.
INFO:tensorflow:Saving labels in /tmpfs/tmp/tmp9hfynxdy/labels.txt
INFO:tensorflow:Saving labels in /tmpfs/tmp/tmp9hfynxdy/labels.txt
INFO:tensorflow:TensorFlow Lite model exported successfully: ./model.tflite
INFO:tensorflow:TensorFlow Lite model exported successfully: ./model.tflite
See the image classification examples guide for more details about how to integrate the TensorFlow Lite model into mobile apps.
This model can be integrated into an Android or an iOS app using the ImageClassifier API of the TensorFlow Lite Task Library.
The allowed export formats can be one or a list of the following:
By default, it just exports TensorFlow Lite model with metadata. You can also selectively export different files. For instance, exporting only the label file as follows:
model.export(export_dir='.', export_format=ExportFormat.LABEL)
INFO:tensorflow:Saving labels in ./labels.txt
INFO:tensorflow:Saving labels in ./labels.txt
You can also evaluate the tflite model with the evaluate_tflite method.
model.evaluate_tflite('model.tflite', test_data)
{'accuracy': 0.9128065395095368}
Advanced Usage
The create function is the critical part of this library. It uses transfer learning with a pretrained model similar to the tutorial.
The create function contains the following steps:
- Split the data into training, validation, testing data according to parameter
validation_ratioandtest_ratio. The default value ofvalidation_ratioandtest_ratioare0.1and0.1. - Download a Image Feature Vector as the base model from TensorFlow Hub. The default pre-trained model is EfficientNet-Lite0.
- Add a classifier head with a Dropout Layer with
dropout_ratebetween head layer and pre-trained model. The defaultdropout_rateis the defaultdropout_ratevalue from make_image_classifier_lib by TensorFlow Hub. - Preprocess the raw input data. Currently, preprocessing steps including normalizing the value of each image pixel to model input scale and resizing it to model input size. EfficientNet-Lite0 have the input scale
[0, 1]and the input image size[224, 224, 3]. - Feed the data into the classifier model. By default, the training parameters such as training epochs, batch size, learning rate, momentum are the default values from make_image_classifier_lib by TensorFlow Hub. Only the classifier head is trained.
In this section, we describe several advanced topics, including switching to a different image classification model, changing the training hyperparameters etc.
Customize Post-training quantization on the TensorFLow Lite model
Post-training quantization is a conversion technique that can reduce model size and inference latency, while also improving CPU and hardware accelerator inference speed, with a little degradation in model accuracy. Thus, it's widely used to optimize the model.
Model Maker library applies a default post-training quantization techique when exporting the model. If you want to customize post-training quantization, Model Maker supports multiple post-training quantization options using QuantizationConfig as well. Let's take float16 quantization as an instance. First, define the quantization config.
config = QuantizationConfig.for_float16()
Then we export the TensorFlow Lite model with such configuration.
model.export(export_dir='.', tflite_filename='model_fp16.tflite', quantization_config=config)
INFO:tensorflow:Assets written to: /tmpfs/tmp/tmpj0o2n8ol/assets
INFO:tensorflow:Assets written to: /tmpfs/tmp/tmpj0o2n8ol/assets
2024-07-19 12:47:14.901056: W tensorflow/core/common_runtime/gpu/gpu_device.cc:1850] Cannot dlopen some GPU libraries. Please make sure the missing libraries mentioned above are installed properly if you would like to use GPU. Follow the guide at https://www.tensorflow.org/install/gpu for how to download and setup the required libraries for your platform.
Skipping registering GPU devices...
INFO:tensorflow:Label file is inside the TFLite model with metadata.
2024-07-19 12:47:15.764806: W tensorflow/compiler/mlir/lite/python/tf_tfl_flatbuffer_helpers.cc:357] Ignored output_format.
2024-07-19 12:47:15.764854: W tensorflow/compiler/mlir/lite/python/tf_tfl_flatbuffer_helpers.cc:360] Ignored drop_control_dependency.
INFO:tensorflow:Label file is inside the TFLite model with metadata.
INFO:tensorflow:Saving labels in /tmpfs/tmp/tmpu6wou7r8/labels.txt
INFO:tensorflow:Saving labels in /tmpfs/tmp/tmpu6wou7r8/labels.txt
INFO:tensorflow:TensorFlow Lite model exported successfully: ./model_fp16.tflite
INFO:tensorflow:TensorFlow Lite model exported successfully: ./model_fp16.tflite
In Colab, you can download the model named model_fp16.tflite from the left sidebar, same as the uploading part mentioned above.
Change the model
Change to the model that's supported in this library.
This library supports EfficientNet-Lite models, MobileNetV2, ResNet50 by now. EfficientNet-Lite are a family of image classification models that could achieve state-of-art accuracy and suitable for Edge devices. The default model is EfficientNet-Lite0.
We could switch model to MobileNetV2 by just setting parameter model_spec to the MobileNetV2 model specification in create method.
model = image_classifier.create(train_data, model_spec=model_spec.get('mobilenet_v2'), validation_data=validation_data)
INFO:tensorflow:Retraining the models...
INFO:tensorflow:Retraining the models...
Model: "sequential_2"
_________________________________________________________________
 Layer (type)                Output Shape              Param #
=================================================================
 hub_keras_layer_v1v2_2 (Hub  (None, 1280)             2257984
 KerasLayerV1V2)

 dropout_2 (Dropout)         (None, 1280)              0

 dense_2 (Dense)             (None, 5)                 6405

=================================================================
Total params: 2,264,389
Trainable params: 6,405
Non-trainable params: 2,257,984
_________________________________________________________________
None
Epoch 1/5
91/91 [==============================] - 20s 189ms/step - loss: 0.9249 - accuracy: 0.7600 - val_loss: 0.7334 - val_accuracy: 0.8801
Epoch 2/5
91/91 [==============================] - 17s 184ms/step - loss: 0.6948 - accuracy: 0.8698 - val_loss: 0.6627 - val_accuracy: 0.9019
Epoch 3/5
91/91 [==============================] - 17s 189ms/step - loss: 0.6521 - accuracy: 0.9038 - val_loss: 0.6668 - val_accuracy: 0.9046
Epoch 4/5
91/91 [==============================] - 17s 191ms/step - loss: 0.6360 - accuracy: 0.9083 - val_loss: 0.6491 - val_accuracy: 0.9046
Epoch 5/5
91/91 [==============================] - 17s 185ms/step - loss: 0.6074 - accuracy: 0.9258 - val_loss: 0.6565 - val_accuracy: 0.8992
Evaluate the newly retrained MobileNetV2 model to see the accuracy and loss in testing data.
loss, accuracy = model.evaluate(test_data)
12/12 [==============================] - 2s 154ms/step - loss: 0.6938 - accuracy: 0.8665
Change to the model in TensorFlow Hub
Moreover, we could also switch to other new models that inputs an image and outputs a feature vector with TensorFlow Hub format.
As Inception V3 model as an example, we could define inception_v3_spec which is an object of image_classifier.ModelSpec and contains the specification of the Inception V3 model.
We need to specify the model name name, the url of the TensorFlow Hub model uri. Meanwhile, the default value of input_image_shape is [224, 224]. We need to change it to [299, 299] for Inception V3 model.
inception_v3_spec = image_classifier.ModelSpec(
    uri='https://tfhub.dev/google/imagenet/inception_v3/feature_vector/1')
inception_v3_spec.input_image_shape = [299, 299]
Then, by setting parameter model_spec to inception_v3_spec in create method, we could retrain the Inception V3 model.
The remaining steps are exactly same and we could get a customized InceptionV3 TensorFlow Lite model in the end.
Change your own custom model
If we'd like to use the custom model that's not in TensorFlow Hub, we should create and export ModelSpec in TensorFlow Hub.
Then start to define ModelSpec object like the process above.
Change the training hyperparameters
We could also change the training hyperparameters like epochs, dropout_rate and batch_size that could affect the model accuracy. The model parameters you can adjust are:
epochs: more epochs could achieve better accuracy until it converges but training for too many epochs may lead to overfitting.dropout_rate: The rate for dropout, avoid overfitting. None by default.batch_size: number of samples to use in one training step. None by default.validation_data: Validation data. If None, skips validation process. None by default.train_whole_model: If true, the Hub module is trained together with the classification layer on top. Otherwise, only train the top classification layer. None by default.learning_rate: Base learning rate. None by default.momentum: a Python float forwarded to the optimizer. Only used whenuse_hub_libraryis True. None by default.shuffle: Boolean, whether the data should be shuffled. False by default.use_augmentation: Boolean, use data augmentation for preprocessing. False by default.use_hub_library: Boolean, usemake_image_classifier_libfrom tensorflow hub to retrain the model. This training pipeline could achieve better performance for complicated dataset with many categories. True by default.warmup_steps: Number of warmup steps for warmup schedule on learning rate. If None, the default warmup_steps is used which is the total training steps in two epochs. Only used whenuse_hub_libraryis False. None by default.model_dir: Optional, the location of the model checkpoint files. Only used whenuse_hub_libraryis False. None by default.
Parameters which are None by default like epochs will get the concrete default parameters in make_image_classifier_lib from TensorFlow Hub library or train_image_classifier_lib.
For example, we could train with more epochs.
model = image_classifier.create(train_data, validation_data=validation_data, epochs=10)
INFO:tensorflow:Retraining the models...
INFO:tensorflow:Retraining the models...
Model: "sequential_3"
_________________________________________________________________
 Layer (type)                Output Shape              Param #
=================================================================
 hub_keras_layer_v1v2_3 (Hub  (None, 1280)             3413024
 KerasLayerV1V2)

 dropout_3 (Dropout)         (None, 1280)              0

 dense_3 (Dense)             (None, 5)                 6405

=================================================================
Total params: 3,419,429
Trainable params: 6,405
Non-trainable params: 3,413,024
_________________________________________________________________
None
Epoch 1/10
91/91 [==============================] - 20s 205ms/step - loss: 0.8808 - accuracy: 0.7558 - val_loss: 0.6803 - val_accuracy: 0.8828
Epoch 2/10
91/91 [==============================] - 19s 208ms/step - loss: 0.6624 - accuracy: 0.8905 - val_loss: 0.6485 - val_accuracy: 0.9019
Epoch 3/10
91/91 [==============================] - 19s 206ms/step - loss: 0.6200 - accuracy: 0.9207 - val_loss: 0.6320 - val_accuracy: 0.9046
Epoch 4/10
91/91 [==============================] - 18s 201ms/step - loss: 0.6035 - accuracy: 0.9245 - val_loss: 0.6214 - val_accuracy: 0.9128
Epoch 5/10
91/91 [==============================] - 18s 199ms/step - loss: 0.5922 - accuracy: 0.9320 - val_loss: 0.6127 - val_accuracy: 0.9155
Epoch 6/10
91/91 [==============================] - 18s 197ms/step - loss: 0.5777 - accuracy: 0.9372 - val_loss: 0.6121 - val_accuracy: 0.9101
Epoch 7/10
91/91 [==============================] - 19s 204ms/step - loss: 0.5709 - accuracy: 0.9444 - val_loss: 0.6100 - val_accuracy: 0.9155
Epoch 8/10
91/91 [==============================] - 19s 204ms/step - loss: 0.5635 - accuracy: 0.9512 - val_loss: 0.6117 - val_accuracy: 0.9019
Epoch 9/10
91/91 [==============================] - 19s 205ms/step - loss: 0.5544 - accuracy: 0.9509 - val_loss: 0.6115 - val_accuracy: 0.9101
Epoch 10/10
91/91 [==============================] - 19s 205ms/step - loss: 0.5515 - accuracy: 0.9554 - val_loss: 0.6082 - val_accuracy: 0.9128
Evaluate the newly retrained model with 10 training epochs.
loss, accuracy = model.evaluate(test_data)
12/12 [==============================] - 2s 166ms/step - loss: 0.6265 - accuracy: 0.8992
Read more
You can read our image classification example to learn technical details. For more information, please refer to:
- TensorFlow Lite Model Maker guide and API reference.
- Task Library: ImageClassifier for deployment.
- The end-to-end reference apps: Android, iOS, and Raspberry PI.